목차
- Navigation
- 상세페이지에서 모달뷰 띄우기
- 모달뷰 닫기
- 마치며
위 처럼 ListView 아이템 클릭 → 내비게이션 화면 전환 → 그 화면에서 버튼 클릭 시 모달 뷰 띄우기
이런 간단한 화면 구성을 해보려고 합니다.
Navigation
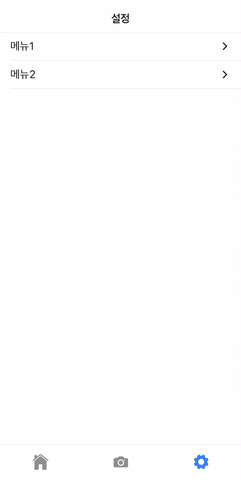
저의 경우 만들어진 탭 페이지에 리스트뷰를 추가했습니다.
1
2
3
4
5
6
7
8
9
10
11
12
13
14
15
16
17
18
19
20
21
22
| <ion-header>
<ion-toolbar>
<ion-title>설정</ion-title>
</ion-toolbar>
</ion-header>
<ion-content>
<ion-list>
<ion-item (click)="goAlarm()">
<ion-label>
메뉴1
</ion-label>
<ion-icon name="arrow-forward" size="small" slot="end"></ion-icon>
</ion-item>
<ion-item>
<ion-label>
메뉴2
</ion-label>
<ion-icon name="arrow-forward" size="small" slot="end"></ion-icon>
</ion-item>
</ion-list>
</ion-content>
|
사실 설명이 필요 없을것 같습니다. 다만 9번 줄에 click 이벤트를 건 점은 주목해야 합니다.
1
2
3
4
5
6
7
8
9
10
11
12
13
14
15
16
17
| import {Component, OnInit} from '@angular/core';
import {NavController} from '@ionic/angular';
@Component({
selector: 'app-settings',
templateUrl: './settings.page.html',
styleUrls: ['./settings.page.scss'],
})
export class SettingsPage implements OnInit {
constructor(public navCtrl: NavController) {}
ngOnInit() {}
goAlarm(): void {
this.navCtrl.navigateForward('settings/alarm');
}
}
|
10번 줄 처럼 생성자에 NavController 를 Injection 받도록 합니다.
13번 줄의 goAlarm() 메소드 처럼 navigateForward 메소드에 이동할 페이지의 path를 적어주면 됩니다.
참고로 그 path는 routing module에서 설정한 라우트의 path 입니다.
결론적으로, 이동할 페이지의 path만 저렇게 넣어주면 알아서 다 됩니다. 참 쉽죠?
상세페이지에서 모달뷰 띄우기
1
2
3
4
5
6
7
8
9
10
11
12
13
14
15
16
17
| <ion-header>
<ion-toolbar>
<ion-title>알림</ion-title>
<ion-buttons slot="start">
<ion-back-button></ion-back-button>
</ion-buttons>
<ion-buttons slot="end">
<ion-button (click)="openAlarmDetailModal()">
<ion-icon slot="icon-only" name="add"></ion-icon>
</ion-button>
</ion-buttons>
</ion-toolbar>
</ion-header>
<ion-content>
</ion-content>
|
4번 줄처럼 back 버튼을 넣어줍니다. 텍스트나 아이콘 등의 커스터마이징도 가능합니다.
back 버튼의 경우는 별도 이벤트 코딩을 안해도 알아서 잘 작동합니다.
8번줄에 모달을 띄우기 위한 click 이벤트를 걸어줬습니다.
1
2
3
4
5
6
7
8
9
10
11
12
13
| export class SettingsAlarmPage implements OnInit {
constructor(public modalController: ModalController) {}
ngOnInit() {}
async openAlarmDetailModal() {
const modal = await this.modalController.create({
component: SettingsAlarmDetailComponent,
componentProps: {value: 123},
});
return await modal.present();
}
}
|
위 페이지의 script 부분입니다.
2번 줄 처럼 생성자에 ModalController 를 Injection 받습니다.
8번 줄을 보면 알 수 있듯 저의 경우 SettingsAlarmDetailComponent 를 모달로 띄울것이라서 위 처럼 설정해주었습니다.
모달뷰 닫기
1
2
3
4
5
6
7
8
9
10
11
12
13
14
15
16
17
18
19
| <ion-header>
<ion-toolbar>
<ion-title>알림 설정</ion-title>
<ion-buttons slot="start">
<ion-button (click)="dismissModal()">
닫기
</ion-button>
</ion-buttons>
<ion-buttons slot="end">
<ion-button (click)="saveAndDismissModal()">
저장
</ion-button>
</ion-buttons>
</ion-toolbar>
</ion-header>
<ion-content>
</ion-content>
|
5번, 10번 줄에서 각 아이콘에 click 이벤트를 걸어줬습니다.
1
2
3
4
5
6
7
8
9
10
11
12
13
| export class SettingsAlarmDetailComponent implements OnInit {
constructor(private modalCtrl: ModalController) {}
ngOnInit() {}
dismissModal() {
this.modalCtrl.dismiss();
}
saveAndDismissModal() {
this.modalCtrl.dismiss();
}
}
|
위 처럼 생성자에 ModalController 를 Injection 받습니다.
모달뷰를 닫는 건 저 한 메소드면 됩니다. 참 쉽죠? 물론 데이터 저장 등의 후 처리는 각자 알맞게 코딩합시다.
마치며
생각보다 너무 간단해서 딱히 추가할 말이 없네요.
UI Components에서 더 많은 것들을 확인 할 수 있습니다.